inspection-manager

IM User Guide:

How to load Inspections and Properties using the Property Tree Integration

The purpose of this guide is to explain how to load inspections and property details from Property Tree into your Inspection Manager account.

Please ensure you have selected a Property Manager in the business roles section of the property.
(If you know how to do this, skip to step 2.)

A. Business Roles must also be correctly assigned. Either of the following 2 scenarios will prevent a property from syncing to Inspection Manager:

    1. Property Manager Business Role is Unassigned.
    2. Property Manager Business Role is assigned to a user that doesn’t match an existing Inspection Manager user.
If you read the word “Unassigned” next to the Business Role: Property Manager, you will need to add a User that has an email that matches a user in Inspection Manager.

Click on the pencil to assign a Business Role.

Please ensure you have an inspection scheduled between the current time/date and the next 7, 15, 30 or 60 days depending on your office settings. (If you know how to do this skip to step 3.)

If you are unsure of your office settings, then on the Inspection Manager website please navigate to: Settings > Scroll to bottom right of page
Only accessible to Users with Office Manager Access.
A. If no inspections are scheduled please navigate to the Tenant, find the inspections area and click on the + symbol to add a new inspection for this tenant.

Click on the + symbol to add a new inspection to a property.

B. If an inspection does exist for the tenant and you can see it is in “Tentative” status, then you can click on the eye symbol to edit the inspection.
If there is already an inspection and it is in the “Tentative” status, then click on the EYE symbol.
Please ensure that the inspection is in “Confirmed” status.
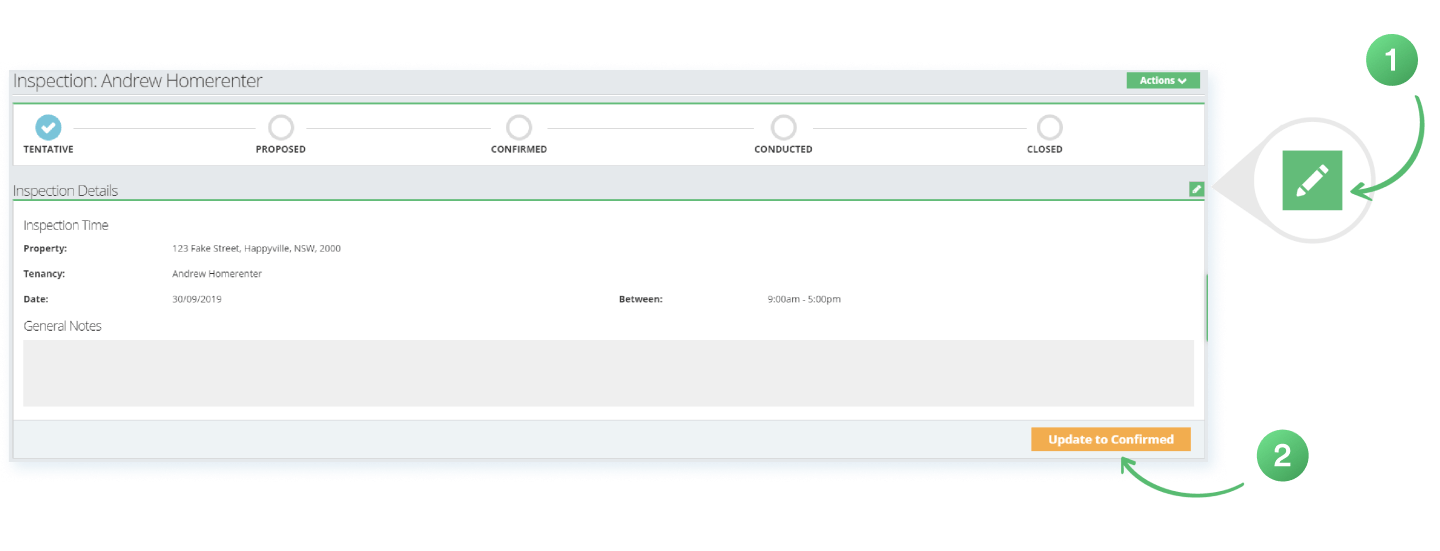
A. Once the inspection has been created you then must ensure that the inspection is in “Confirmed” status. (This can be done by clicking on “Update to Confirmed” when editing the inspection).
If you only get the prompt to “Update to Conducted” rather than confirmed, that means that the inspection is time and dated for the past, and will need to be pushed forward to a time and date in the future. (you can change this by clicking on this pencil).

Please click “Update to Confirmed” to change the inspection into Confirmed status.

B. Once the inspection is confirmed please navigate to the PropertyTree tab in Inspection Manager and click on the green “Sync Now” button.
(Only accessible by Users with Office Manager Access.)
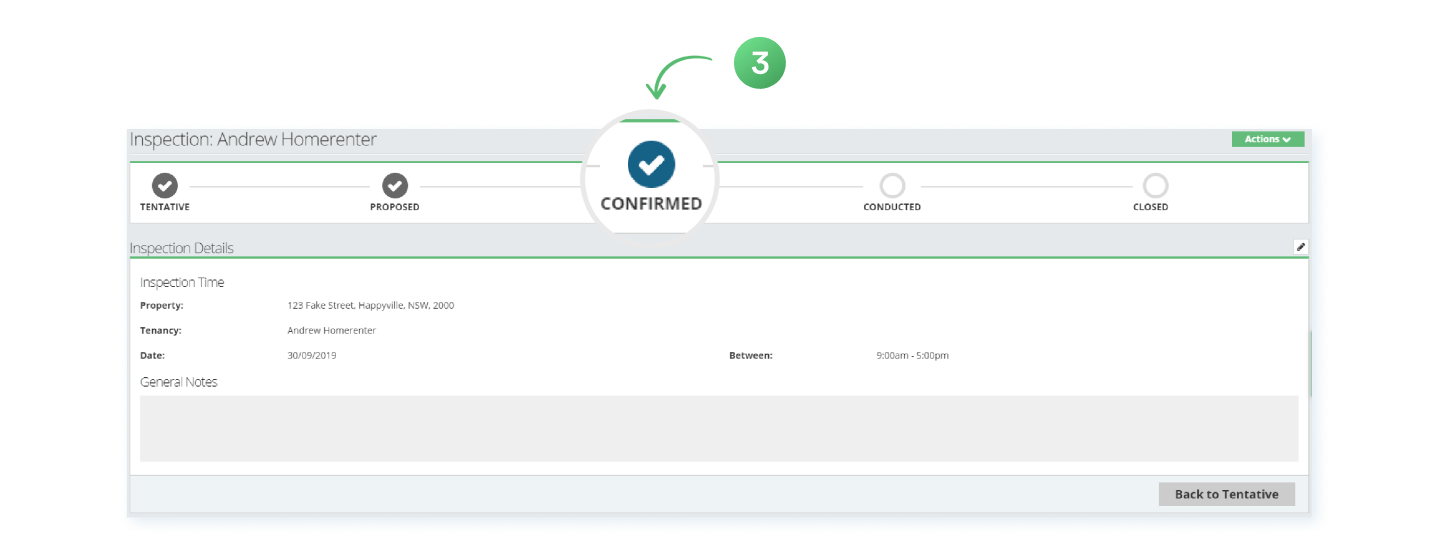
Please note that this tick indicates the inspection is now in “Confirmed” status which means this inspection has met the requirements for a sync.

Let us know what you want to see next.

If you have a suggestion or idea that could help us continue to create amazing content, we'd love to hear it!